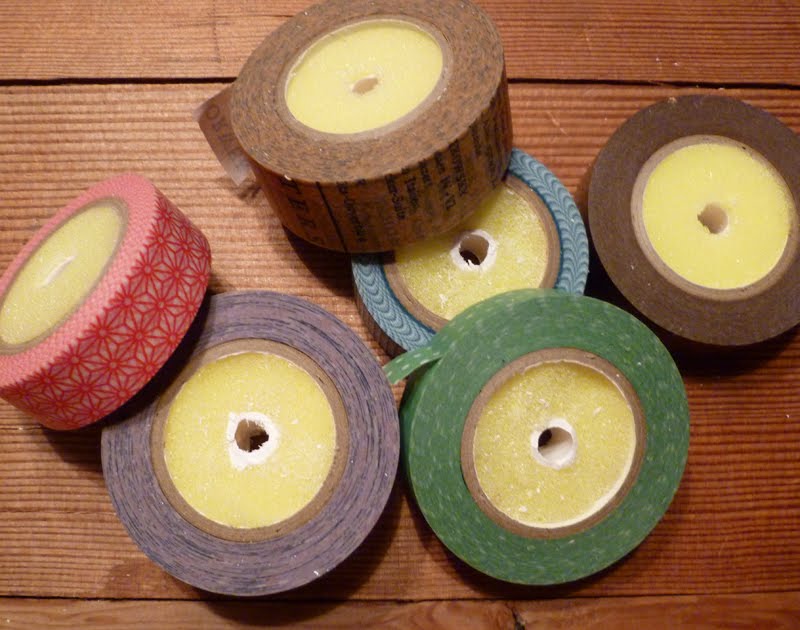
Have you purchased any of the popular Washi, Japanese Rice Paper Tape? It’s very cool, to say the least. So many colors and patterns, and so many possibilities, what’s not to love. Just Google Washi tape or Japanese paper tape and you just may spend hours dreaming up ideas of how you might use it if you’re not already crafting with it. My small collection of Japanese paper tape has been rattling around in one of my cigar boxes.
 I was actually online today looking for a tape dispenser or dispensers to hold them when I had a Eureka moment- Turn the cigar box into a tape dispenser!
So…I packed up my box of tape and headed into town to Petaluma’s Orchard Supply Hardware. My first goal was to find something to hold the tape rolls, I was thinking a dowel rod when I saw these little foam paint rollers. I slid one through the center of one of the rolls of tape and it was a perfect, snug fit. On to finding a dowel to run through the center hole of the foam rollers, I spied a rack of aluminum tubing. Way better than wood as the dowel could ultimately bow from the weight of the tape rolls.
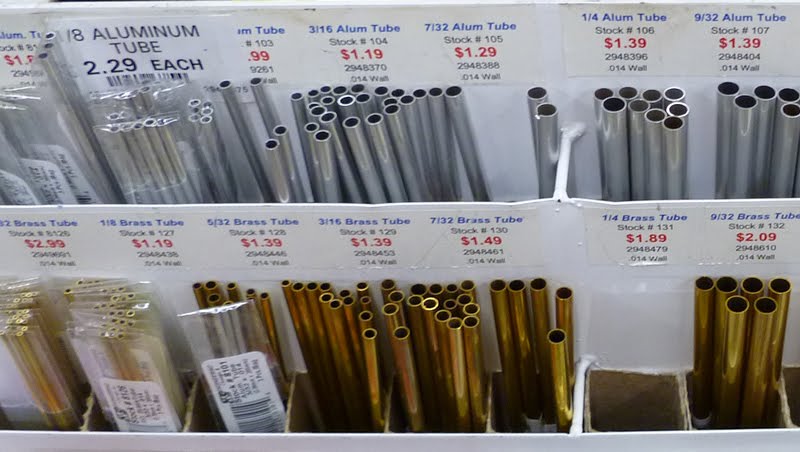 Next, how to secure the tubing. That’s where super-helpful Ted came in. He was fun to brainstorm my project with, and he turned me onto these cool self drilling screws. Never heard of them, but now that I have, I’m sure I’ll be picking up more for future projects. Thanks Ted!
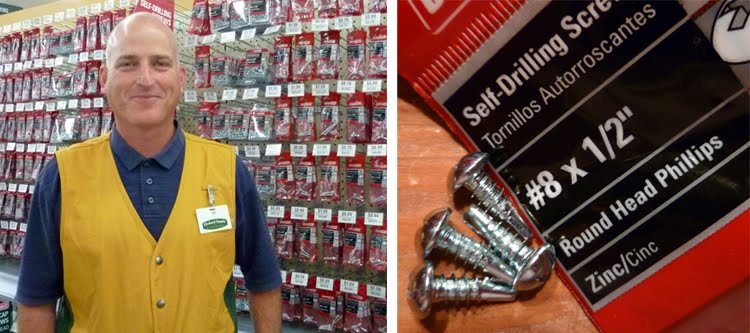 Finally, off to find a blade for the tear edge of the box. Replacement hacksaw blades would be ideal!
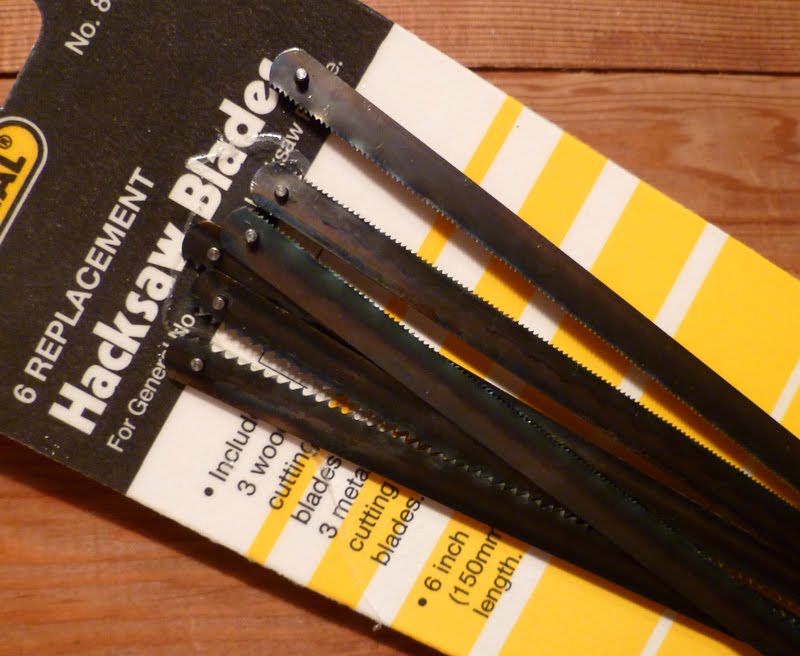 Back home, I used my thrift store steak knife to divide the sponge rollers into sections to fit my tape rolls and popped them into the centers. It is important that each tape roll has its own separate foam roller center as the rolls of tape must be able to turn independent from one another.
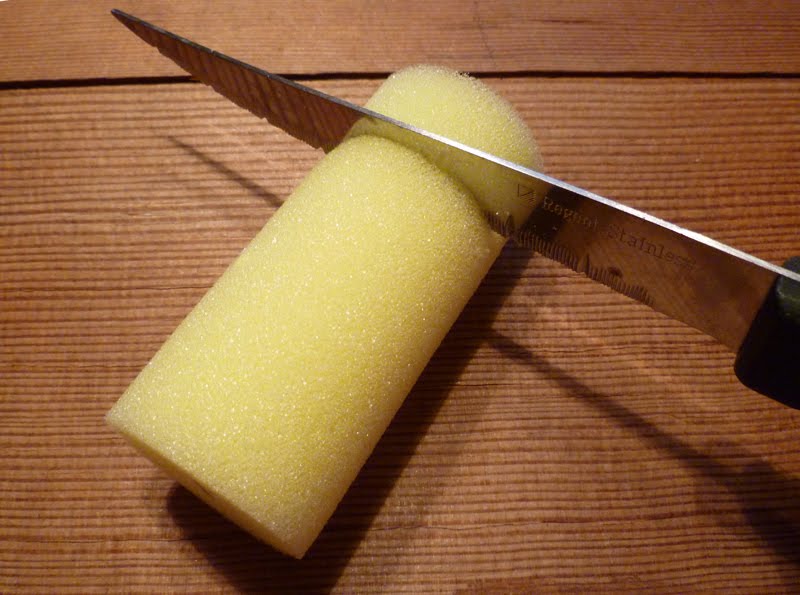
 I measured my tubing to the width of the inside of the box and sawed it also with my knife.
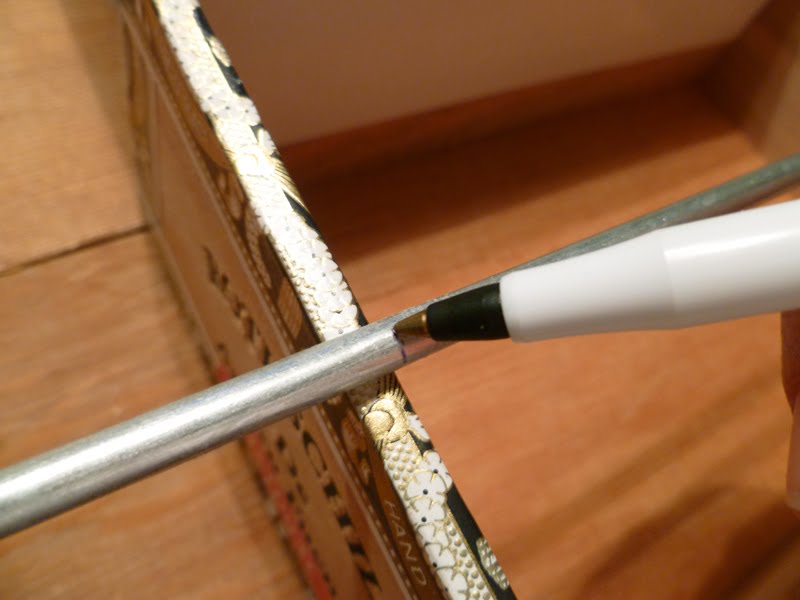 (Not a knife we use for food, by the way.)
 Using a new, full roll as a guide for height, I centered it on the side of the box and marked the center hole. (I slid out the narrow ink tube of my ballpoint pen to fit into the hole for marking.) I measured from top and edge to the hole mark and duplicated that on the other side to make the hole for the opposite end of the tubing.
 I drilled holes at the marks on each end of the box.
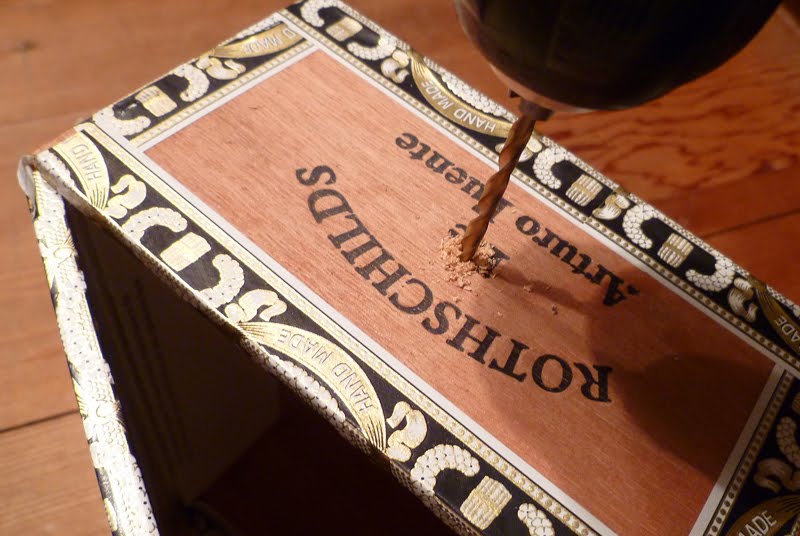 I then threaded the rolls onto the tubing. I separated each roll with two washers just to keep them from snagging on one another and was sure to align the tape to come off in the same direction on each roll.
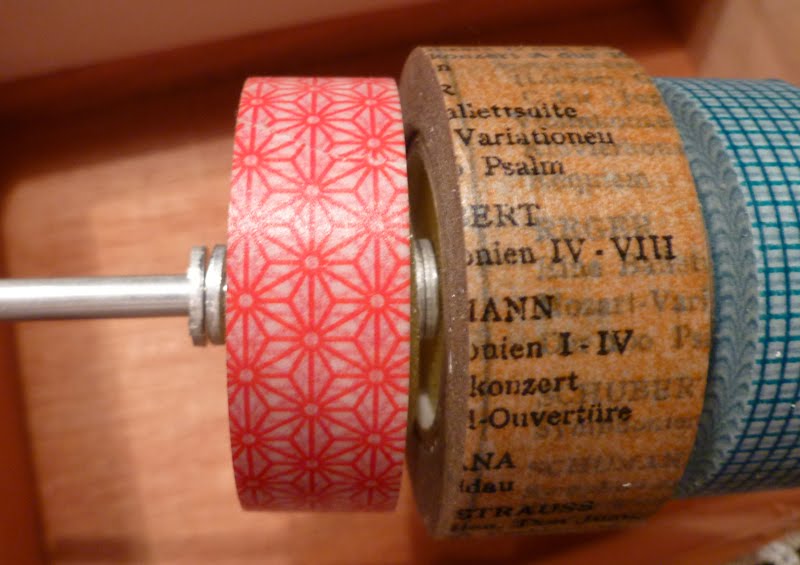 I screwed the tubing into place with the self drilling screws.
 I chose the most coarse hacksaw blade to create the best deckling when tearing off the tape, and drilled two holes into it.
 Using one of the other blades I notched out small sections for the little nubs at the end of the hacksaw to fit into to keep the blade flush with the edge of the box.
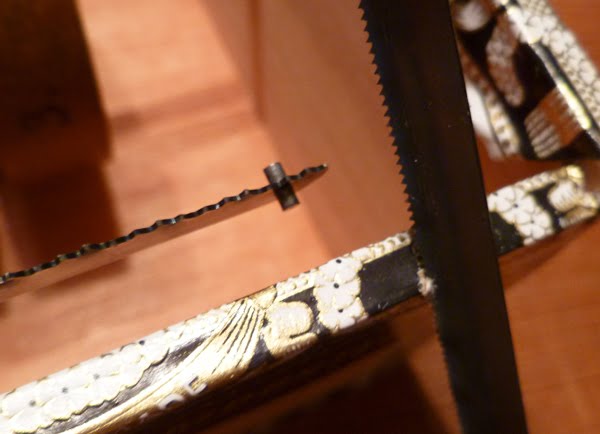 Using tiny screws from my picture hanging hardware stash, I attached the blade to the front of the box with it rising just a bit above the edge of the box itself.
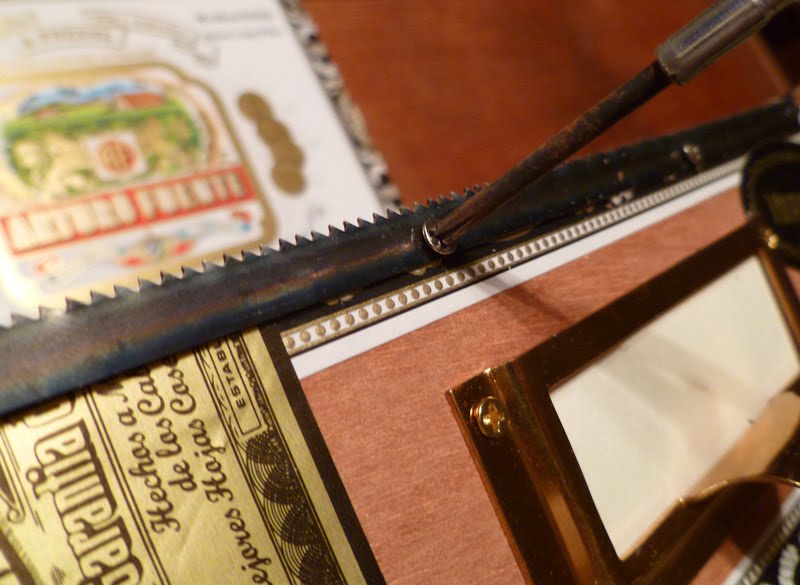 I still have room for a couple more rolls in this box before I begin another. And it is easy enough to remove the screws and tubing to add or replace any rolls.
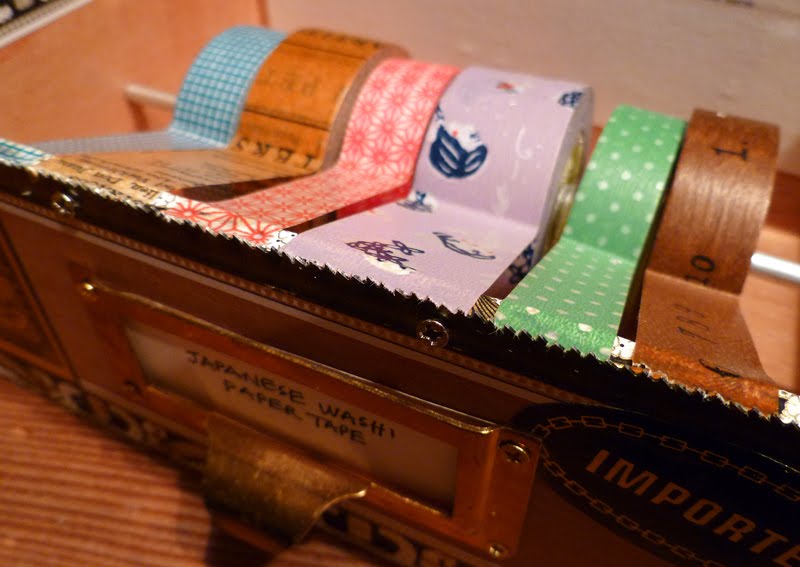 This was a very simple project with the right tools and inexpensive hardware.
 There are many ways to modify this concept, if you come up with one, I’d love to know about it!