So, yeah, sometimes I cheat. Sorta.![]() See my latest post over at SC Johnson to see how I transform discount store-bought stationery into lovely custom note cards.
See my latest post over at SC Johnson to see how I transform discount store-bought stationery into lovely custom note cards.

So, yeah, sometimes I cheat. Sorta.![]() See my latest post over at SC Johnson to see how I transform discount store-bought stationery into lovely custom note cards.
See my latest post over at SC Johnson to see how I transform discount store-bought stationery into lovely custom note cards.
Many years ago, my sweet, late Aunt Erma, gave to me a very old and tattered quilt. She told me that it was made by my grandmother while pregnant with my father. That would have been in 1930, when my aunt was only 8, a time when women used what they had on hand to quilt with. She pointed to a few of the bright red-checked sections of one of the Dresden plate patterns and told me that was cut from her favorite out-grown dress. The quilt immediately became one of my most precious possessions. Recently, I went about photographing some of the beautiful plate design sections with plans to reproduce them into something special that I could use or display. I rigged my own camera set-up using upside-down stools, books and a modified book rack to hold my camera in the exact same place and distance from each quilt section to photograph.
 I decided a charm necklace would be a great idea for starters. And for a project like this, PhotoJewelryMaking.com, one of my awesome blog sponsors, has many options for photo frames or bezels to work with. But I’d been wanting to dig into my stash of vintage drapery rings ever since THIS post and thought the quilt images and the rings would be a perfect combination.
 I cropped the plate images to circles for cutting guides and sized them to fit the 5/8″ brass rings.
 I went about creating charms similar to my decal penny project that you can find instructions to HERE.
 Using Amazing Glaze embossing powder and my little toaster oven I was able to create the quilt charms. When working with Amazing Glaze and paper, there’s a bit of trial and error, especially when your main jewelry piece does not have a backing to catch melting resin. But Amazing Glaze is also quite forgiving and you can usually make corrections by re-heating and re-glazing the same piece.
  I think my charm necklace turned out pretty sweet.
 I made this solitary pendant using a larger brass curtain ring with shabby paint splatters left on it to hold my favorite Dresden plate image that I cut out using my Martha Stewart 1″ scalloped circle punch.
 For even MORE fun ideas crafting outside the box, check out my Personalized Jewelry post over on SC Johnson!
Sometimes, a pet gift is less about honoring the pet and more about honoring the special pet owner. Here is a project that does both. A custom dog toy- the personalized tennis ball. Plan A: I’d pick up some tennis balls on sale at the sporting goods store, borrow my daughter’s wood-burning set, purchase the wood-burning alphabet at the craft store using my 40% off coupon and brand a few tennis balls. FAIL. Turns out the alphabet letters only leave blobs of burnt fuzz somewhat in the shape of a letter and are best left for wood surfaces only. I chose burning over paint as I don’t know enough about the toxicity of various paints and pet health, but I figured melting the fuzz on a tennis ball would be safe enough. So, for plan B, I did the following:
Printed out the name I wanted to personalize to the ball to fit in the area and taped it over a strip of generic office-supply carbon paper. I printed in light gray in order to see the areas I’ve traced when I get to that part.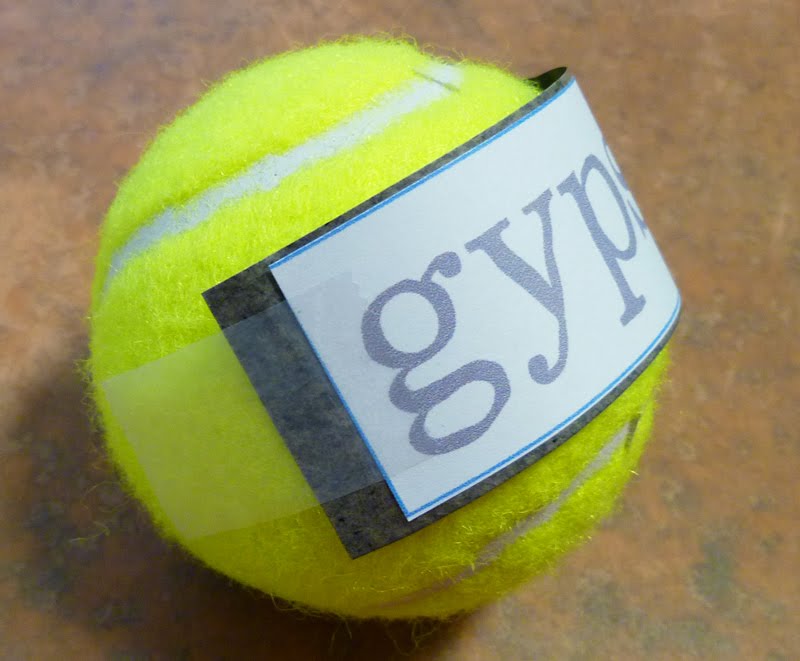 Using a ball-point pen, I filled in the lettering with as much pressure as I could without tearing through the paper to transfer the lettering.
 Once transferred, I went over the lettering with the fine tip of the wood-burning tool. Be sure that you are in a safe and well-ventilated area when burning synthetic fuzz.
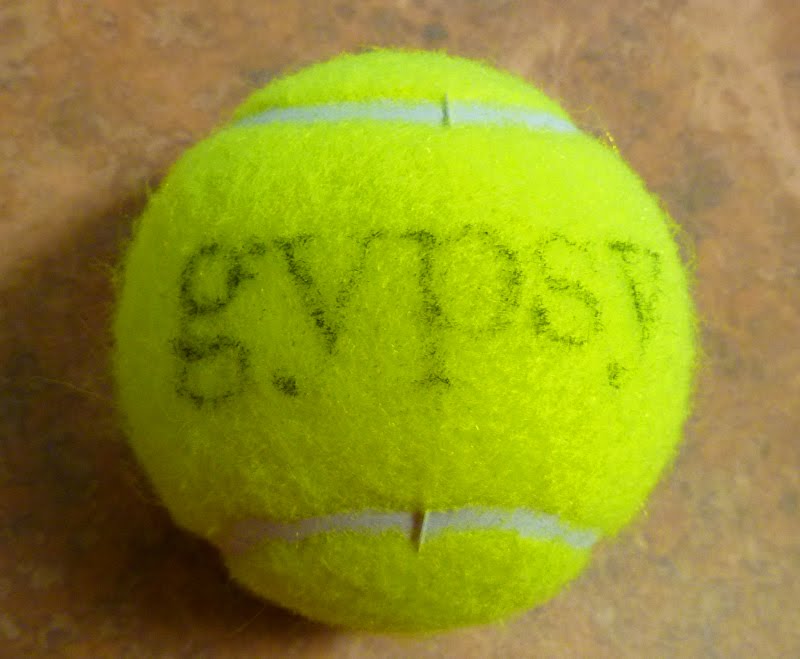
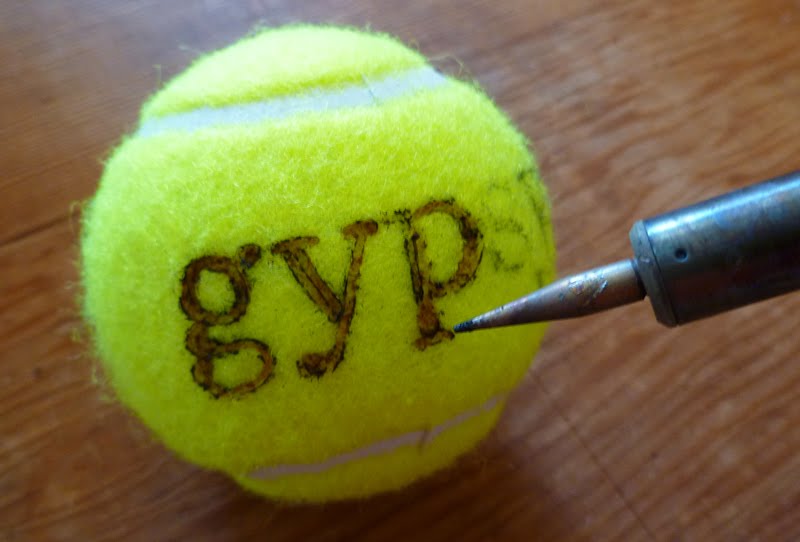 It helps to keep the printed lettering near by for visual reference on the areas that may have not transferred well. You can use scissors or a disposable razor to remove some of the heavier fuzz in the area you plan to burn. Lightly wash and dry the ball to remove any remaining carbon residue.
You may also choose to freehand the lettering as I did for my dog’s tennis ball. Here are some fun ideas for personalized tennis balls:
• Tuck into your dog’s mouth, if you can get him/her to stay long enough, for a fun photo op.
• Cut a long slit into the top of the ball for holding a photo of your dog. Place ball onto a wooden curtain ring or other similar stand to keep it from rolling away.
• Drop several personalized balls into a cylindrical glass container, include photos or pet mementos to create a special display.
• Wrap 3 balls in cellophane (you really only have to personalize one) and tie at the ends like a giant candy wrapper as a holiday gift. Or, cinch and tie between balls like sausage links.
• With a craft knife, score an X into the top of the ball and push a knotted loop of ribbon, string or rope into the score to create a special Christmas ornament, or to use as a marker for the leash hook.  I used striped rope salvaged from a holiday gift bag handle.
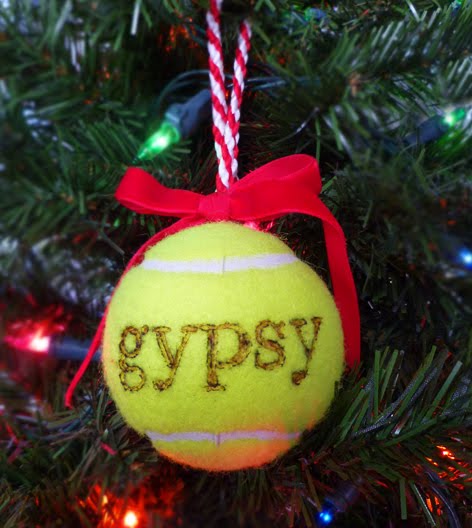 Who is Gypsy? My sweet mom lives alone in an apartment in Arkansas. Her very dear friend, Don, another tenant in the complex, visits her daily. Don has a special companion, a very chubby little Dachshound, (which I would more lovingly refer to as a foot stool,) named Gypsy. Mom tells me that Don not only reads my blog, but he actually makes some of the crafts I share. Thank you Don! I’ll be sending a care package to Mom soon with the tennis ball gift for your pup included!!


